Shading the clothes
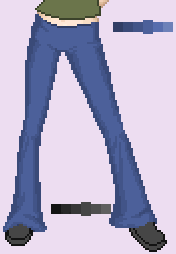
I start with the pants. Before I start to shade I duplicate the pants layer so I can go back if I don't like what I've done. In the layer palette right-click the pants layer and choose duplicate. I turn of the visibility for the 'copy of Pants' layer (click on the glasses in the layer palette) and then click on the pants layer to make sure that is the active layer.
Now I get the magic wand and click anywhere on the outline of the pants. I then choose Selections -> Modify -> Select Similar to select the rest of the outline. Then I choose Selections -> Save to disk -> and save my selection as 'temp.sel'. I don't need the selection right now, so I press CRTL+d to make it go away.
I lock the transparency of the layer so I don't need to worry about keeping within the outlines. (in the layer palette, click on the lock to the right so the red cross goes away and the layer transparency is locked).
Then I grab my paint brush, hold down the CTRL key to get the color picker and click on the dark color in the palette. I color in where the shadows will be. (I don't worry about not painting over the outline - thats why I saved the outline selection before.) The shading of the base can be used as a guide line for where to shade, but DON'T follow it completely! We're doing clothes, not body paint...
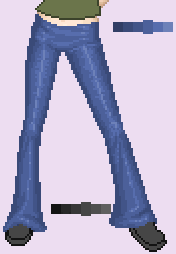
Now I grab the darker color and draw (on top of the dark color) where the darkest shadows will be. I also change the dark color here and there.
Now I get the light color and do the highlights. I also change the other colors where it seems fit.
And finally the lighter color.
At this points the pants are pixel shaded. If I put some more effort into the shading with the paint brush I could use them as they are. BUT this I will not do; for this doll I'd like a more smooth look.
I duplicate the pants layer for backup.
I grab the retouch tool on these settings (smudge):
and start smudging.
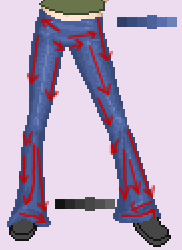
Now the way you smudge is very crucial here. You want to keep the basic shading and folds you've just done. The technique I use is to use short strokes following the shape you are smudging... that is, ALONG the lines - not across. Also I try to smudge where 2 colors meet rather than smudging in the middle of the color.
You may have to smudge several times in the same place, but better start out too gentle than overdoing it from the start.
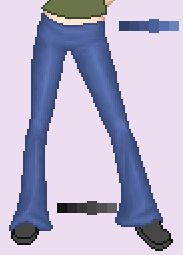
When I'm all done smudging the pants look like this:
Now I put the outline back on: Choose Selections -> Load from disk... and browse for the 'temp.sel' file. When the selection is loaded I get the flood fill tool and the outline color. I set the opacity of the flood fill tool to 55 instead of 100 (anywhere between 40 and 70 is fine, try your way - the outline should be clearly visible, but not too dark) and fill in the outline selection.
Yup, they're done.
Now I do the same with the shirt: backup copy of layer, select outline and save to disk, lock layer transparency.
Then paint dark color, then darker; light color, then lighter:

and finally smudge and outline:
And the boots:
>>> next page, Shading the hair>>>

