Adding extras and fixing the outline
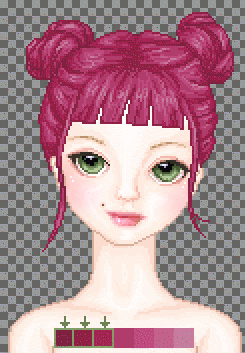
Now take a good look at the hair, does anything need to be changed? use the entire palette to add or change bits - I've mainly added some shading to the bangs at this step.

Next I'll bring the outline back. I do this by making the 'hair copy' visible and active again. Using the color selection tool I select the entire outline by clicking the outline color once.
When the outline is selected I hide the backup layer again and make the 'hair' layer active. I use the color picker to grab the outline color and flood fill inside the selection; the outline is back.
Now I hide the selection border (CTRL+T) and grab the darkest shadow color. With this color I go over the outline on the places where it is next to base color or highlights. If there is any shadow pixels next to the outline I will leave it dark.
Now the parts of the outline that is inside the hair might still be standing out too much. So I grab the lightest shadow color and go over the outline to soften the lines. On the very dark parts of the hair I leave the outline in the darker shadow color.
Also, you might need to lighten the tips of wisps or entire strands sticking out from the hair, they usually look better when they are not as dark.

Don't overdo this step, 2 colors for the outer outline is usually all it takes - the 'inner' outlines may need to be a tone lighter.
Another important extra is shading the base underneath the hair. It adds to the 3d look and the impression that the hair is actually on the doll. Get some dark tones from the base and shade with the pencil tool.
Compare this pic with the previous one and you will see the hair blends in with the skin a lot better. It's a subtle difference, but it's there.

>>> next page, Changing the palette >>>
